Mounting Network Locations on Linux Using Samba
A convenient way to browse files on a networked drive is to map its location to your operating system so that it automatically connects to the drive each time it starts up. Mapping networked drives on Mac or Windows is pretty straightforward using the Mac Finder and Window’s explorer GUIs and both give you an option to automatically reconnect on startup. On Linux however, a little more work is involved to automatically map network locations, so this article will describe how to map network drives on a machine running the Ubuntu flavour of Linux.
Mapping network drives on Linux is called mounting. For example, if you have all your photos on a networked drive you’ll need to mount this directory onto your Linux desktop in order to access it. In Ubuntu, network mounts are temporary by default. This means that the next time you restart Ubuntu it will not remember to remount the network drive from the last time you did it. This can be annoying when you want to permanently mount a network drive you will be using a lot. To mount a network drive permanently you will have to add a line to your file /etc/fstab. This file tells Linux what drives you want mounted on boot up. You need to add a line similar to the existing ones, depending on your exact setup.
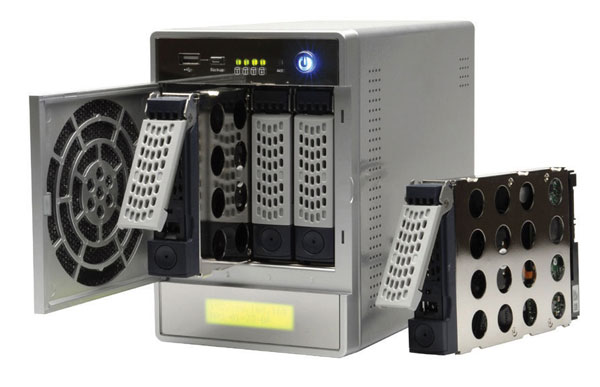
In my case, I keep all my photos centrally on a ReadyNAS file server that sits and runs in a closet under my stairs. I also have a collection of Windows, Mac and Linux laptops/desktops in the house. When anyone wants to look at the photos they just need to connect to the server and navigate to the /photos directory. Since ReadyNAS servers come with built-in support for numerous file protocols all of these systems can access the photos on the ReadyNAS drive using the most suitable protocol.
So what file protocols exactly? Looking at the ReadyNAS configuration panel you’ll see that it includes support for CIFS, NFS and AFP. CIFS stands for Common Internet File System and was largely developed by Microsoft for Windows operating systems (it’s in fact based on a protocol called Server Message Block and therefore CIF is sometimes referred to as SMB). NFS is the Network File System for Unix and Linux operating systems. Finally, AFP is the Apple File Protocol and is used by machines running a Mac OS.
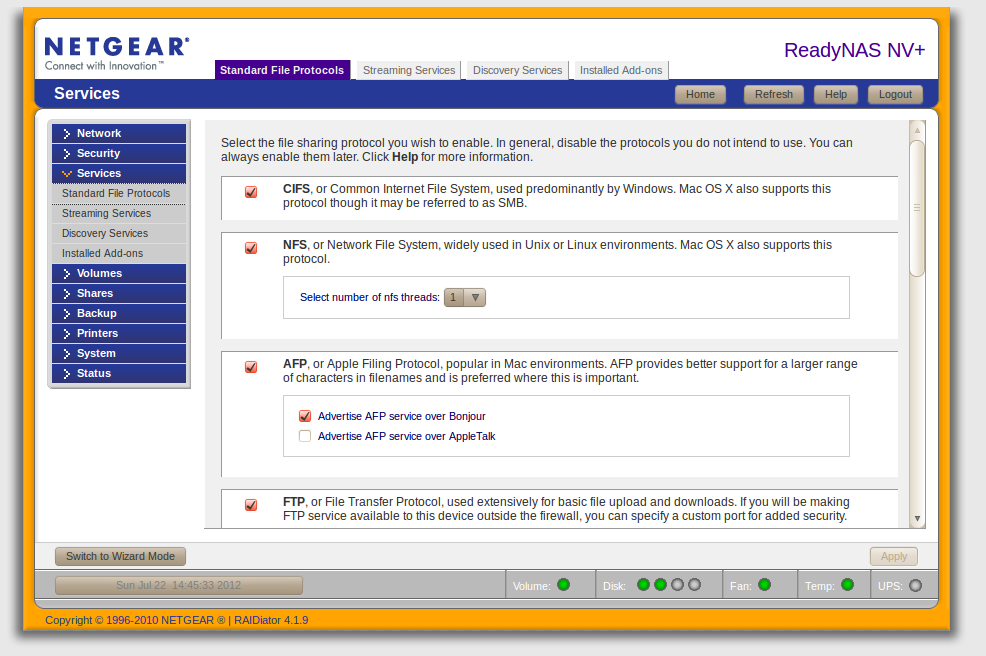
Linux machines have in fact two choices: connect to the ReadyNAS using CIFS or NFS. So what’s the difference? It boils down to security. CIFS is generally the better choice when working within an open network. NFS can be less complicated but is only really suitable within a secure network due to its lack of security. I’m chosing to take the CIFS route so let’s see how that’s done.
Allowing a Linux system to access a Windows CIFS file system is done using Samba. Samba is a free software re-implementation of the CIFS networking protocol designed to enable Windows operating systems and non-Microsoft operating systems to connect. Samba is now standard on nearly all distributions of Linux. Connecting to a CIF file system from Linux is therefore simply a matter of using Samba’s client application which is called smbclient (you only need to install the Samba server if you wish to allow Windows machines to access a Linux file system).
Start by installing the necessary Samba utilities:
1.. Install smbfs and smbclient(the Samba File System & Samba client) on your machine using the following command:
sudo apt-get install smbfs smbclient
2.. Once installed you can check what directories are shared on your network drive using the the command smbclient -L [server] (replace [server] with the IP address or DNS name of your CIFS server). In this example the IP address of my ReadyNAS server is 192.168.1.14 so the command is:
smbclient -L 192.168.1.14
This should display a list of all the currently shared directories on the file server. Here’s an example:
Domain=[WORKGROUP] OS=[Unix] Server=[Samba 3.0.34]

Sharename       Type      Comment
---------       ----      -------
IPC$            IPC       IPC Service (ReadyNAS)
video           Disk      Videos
shared          Disk      Public directory for everyone's use
photos          Disk      Family photos
music           Disk      Everyone's Music
media           Disk      Media downloads

Domain=[WORKGROUP] OS=[Unix] Server=[Samba 3.0.34]

Server               Comment
---------            -------
READYNAS             ReadyNAS
Workgroup            Master
---------            -------
WORKGROUP            READYNAS
To mount the photos directory on my machine I’ll begin by first creating a local folder that will act as the mount point. Here’s the command that will create a mount directory in /home/dermot/Desktop/photos:
mkdir /home/dermot/Desktop/photos
The next step is to test that the mount will actually work using the following command:
sudo smbmount //192.168.1.14/photos /home/dermot/Desktop/photos -o username=admin,password=secretword,uid=1000,mask=000
If this works you should see a /photodirectory mounted on the Desktop. Unmount it again using the following command:
sudo smbumount /home/dermot/photos
Getting drives to mount automatically
So now that we’ve established that the mount works, we can move on to configure Linux to mount this drive automatically each time it starts. This is done by adding the above command to a file called /etc/fstab.
1.. Open the /etc/fstabfile for editing:
sudo gedit /etc/fstab
2.. Add the following line to the end of the fstab file:
//192.168.1.14/photos /home/dermot/photos smbfs auto,credentials=
/home/dermot/.smbpasswd,uid=1000,unmask=000,user 0 0
3.. Run the remount command:
sudo mount -a
4.. Navigate to the /home/dohalloran/Desktop/photos mount directory.
5.. For more information mounting drives in Ubuntu see: https://help.ubuntu.com/community/MountWindowsSharesPermanently
Handling password protected directories
If your network drive is password protected then you’ll need to include your username and password details in the mount command. There’s a way of doing this that’s secure.
1.. When mounting a password protected directory the login details are specified as follows:
sudo smbmount //192.168.1.14/photos /home/dermot/Desktop/photos -o
username=admin,password=secretword,uid=1000,mask=000
2.. However, because the fstab file is located in the /etc directory it means it’s visible and accessible to everyone. This is not a good idea as your username and password will be visible to everyone. So a way around this is to store the username and password in a separate, secure file and simply reference it from the fstab file. So let’s create that file first. Do it in the /rootdirectory as follows:
sudo gedit /root/.credentials
3.. Add the username and password to the newly created file so they appear as follows:
username=your_smb_username
password=your_smb_password
4.. After exiting and saving the file, make it read-only so no one else can access it and see your credentials. This is done using the chmodcommand as follows:
sudo chmod 600 /root/.credentials
5.. Next, open the /etc/fstabfile for editing:
sudo gedit /etc/fstab
6.. Update the line in your fstab file as follows:
//192.168.1.14/photos /home/dermot/photos smbfs auto,credentials=
/home/dermot/.smbpasswd,uid=1000,unmask=000,user 0 0
7.. Remount to test things by run the remount command:
sudo mount -a
Dermot O'Halloran
Extrapolating from experience to form generalizations